Any SEO worth their salt knows that for a website to perform well in the search engines, it needs to go beyond keywords, backlinks and all the other buzzwords used within the industry. Don’t get me wrong, keywords and backlinks are still needed, but if Googlebot can’t crawl and index the website’s content, then all of your efforts have gone to waste. That’s where the technical SEO site audit comes in.
What is a technical SEO audit?
A technical SEO audit is a full analysis of a website’s “behind the scenes” technical setup to ensure that it can be crawled, indexed and ranked appropriately by search engine web crawlers (also known as ‘spiders’), with the main focus being on Googlebot in most cases. There are a wide variety of tools used to conduct technical SEO audits, including Screaming Frog, Search Console, Google’s PageSpeed Insights tool and many more.
In need of a technical SEO audit? Contact our team today and they can start crawling your site straight away!
How to conduct a technical SEO site audit
There are three main areas we look at when conducting a technical SEO site audit; Crawling and Indexing, Website Performance and Website Optimisation. Each step is critical to ensuring a website maximises its ranking potential, and we always have the end goal of increasing organic traffic and conversions in mind. Using tools such as SEMrush and Ahrefs is great for identifying issues, but these tools can often flag up red herrings and lead you down the wrong path, so while they can be used in conjunction with this technical SEO audit process, it's best to roll your sleeves up and dive into the data for yourself.
Follow this guide to learn how to conduct a technical SEO site audit for yourself, or contact our team of SEO professional today if you need a helping hand.
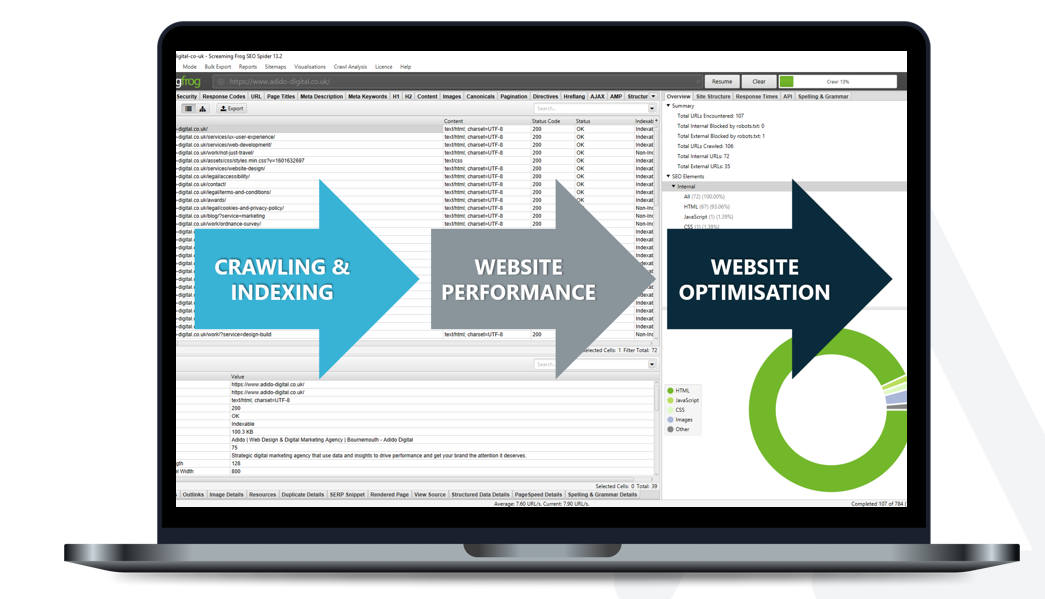
Our technical SEO audit checklist includes, but is not limited to, all of the following:
Crawling and indexing
The first step in your technical SEO site audit is to ensure that Googlebot (which is Google’s web crawler software, with both a desktop and mobile version crawling and collecting documents across the web to build into a searchable index) is actually able to access the content on the website.
Robots.txt
Every website should have a robots.txt file, which is a text file that tells web crawlers such as Googlebot which pages it can and can not crawl on the site. This is useful because there might be pages, or parameters, on your site that you don’t want Google to waste time crawling. For example, if we didn’t want Google to crawl this blog (a reason for this might be because we don’t want Google to index it as we only want to send this blog to our email list and we don’t want other web users to find it), we would add the following instruction into our robots.txt file:
User-agent: Googlebot
Disallow: /blog/how-to-conduct-a-technical-seo-site-audit/
The robots.txt file is also a great place to tell Googlebot (or other web crawlers) where your sitemap is located. This makes for more efficient crawling as Googlebot will quickly have access to all of the pages you want crawled and indexed. We would therefore add the following instruction to our robots.txt file:
Sitemap: https://www.adido-digital.co.uk/sitemap.xml
See our robots.txt file as an example here: https://www.adido-digital.co.uk/robots.txt
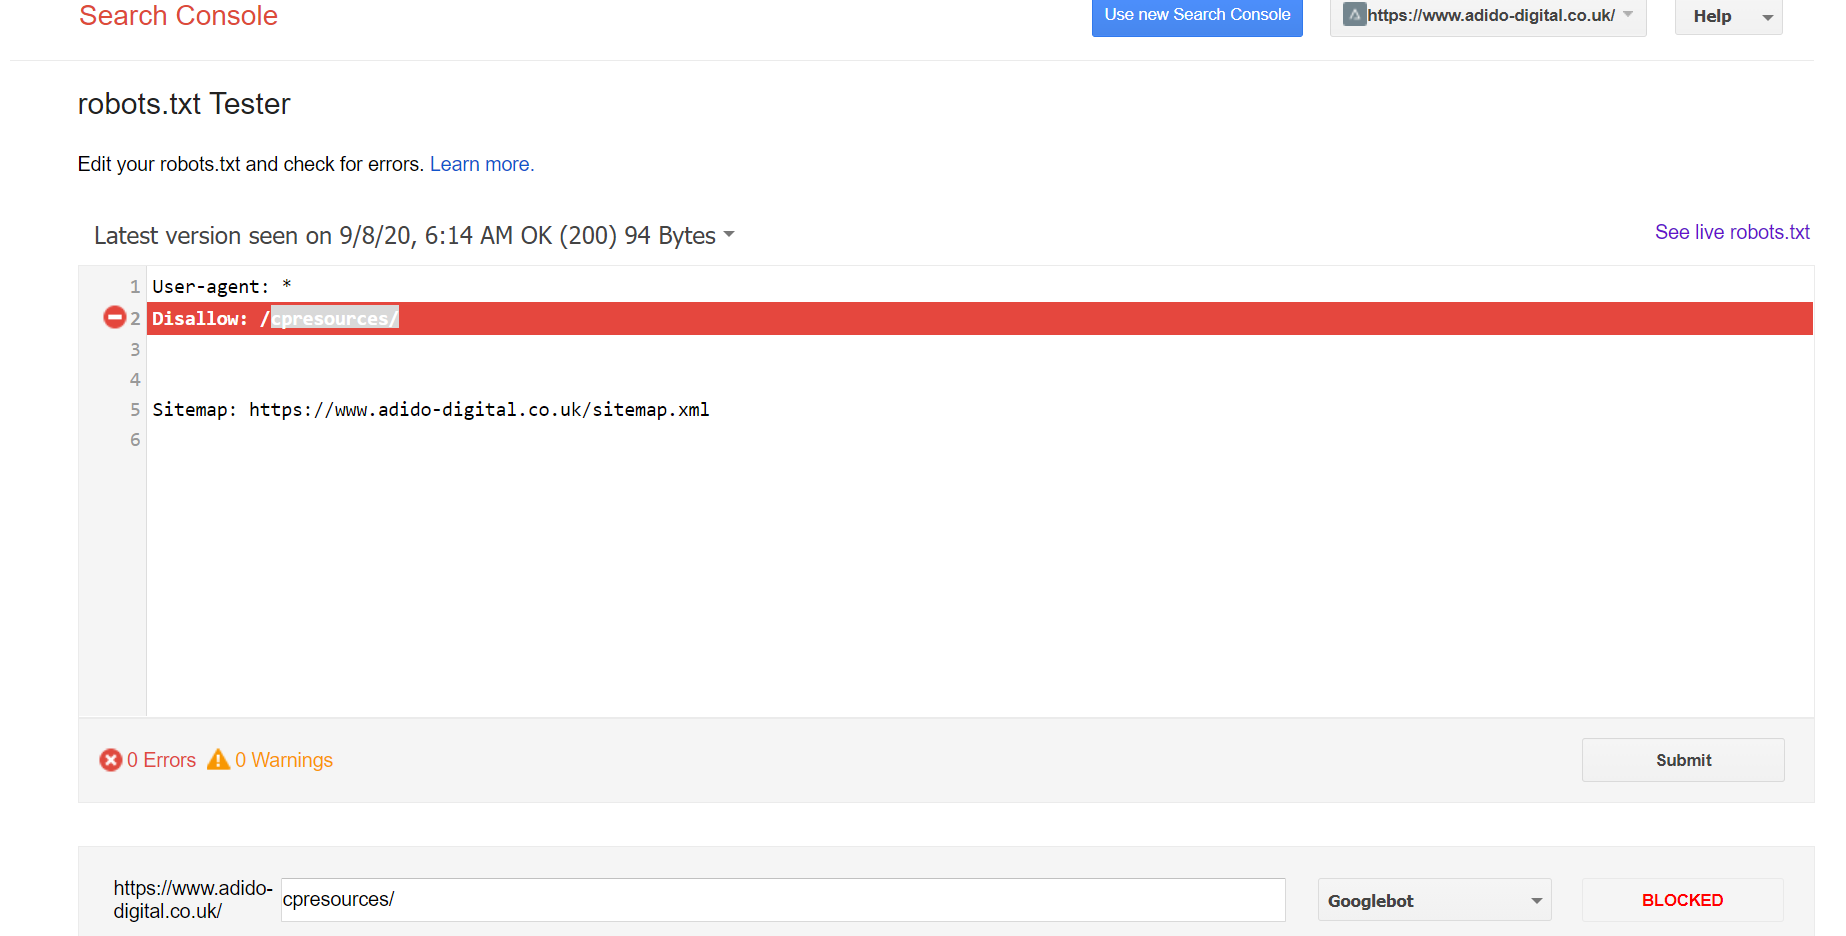
So, within our technical seo site audit, we are checking that the robots.txt file isn’t accidentally blocking web crawlers from crawling the site, and we are ensuring the sitemap is present in the file. We are also checking that any pages we don’t want crawled are disallowed.
We can use Search Console's robots.txt Tester to make sure that the rules we have specified are working:
For larger websites, such as ecommerce sites, we are also checking to ensure that any unnecessary parameters are blocked from being crawled within the robots.txt file. For example, if a website sells a product and has a page listing hundreds of different variations of that product, which can then be filtered by price, colour, size etc. we need to ensure that Googlebot isn’t getting stuck in an endless cycle of crawling each and every combination of those filters. This is known as a ‘spider trap’ and can waste your website’s crawl budget, meaning other, more important pages will be crawled less frequently.
Sitemap
The sitemap is where Googlebot can find all of the pages on your website that you want crawled and indexed. There are two main types of sitemap: an XML sitemap and a HTML sitemap.
XML sitemap
The XML sitemap (or ‘eXtensible Markup Language sitemap) is the best format for Googlebot to quickly crawl and interpret the pages you want indexed. It is essentially a list of your web pages, but the format is designed for web crawlers to understand, rather than users. XML sitemaps can include further instructions such as the priority level of a URL and how frequently you want it crawled (however, Googlebot ignores most of these instructions, it really only cares about identifying the list of URLs to crawl as and when it pleases!).
XML sitemaps have a 50,000 URL limit (or 50MB limit), which can be a problem for large ecommerce websites. There is, however, a solution! Using a Sitemap Index allows you to break your website up so that the URLs can be spread across multiple XML sitemaps.
You can see an example of our XML sitemap Index here: https://www.adido-digital.co.uk/sitemap.xml
HTML sitemap
HTML sitemaps (or ‘Hypertext Markup Language sitemaps) are still useful for web crawlers, as they do contain internal links to all of your web pages, which is the main way in which Googlebot crawls a site (by identifying internal links and following them), but they are better designed for the website user to read, understand and find the web page they are looking for.
You can see an example of our HTML sitemap here: https://www.adido-digital.co.uk/sitemap/
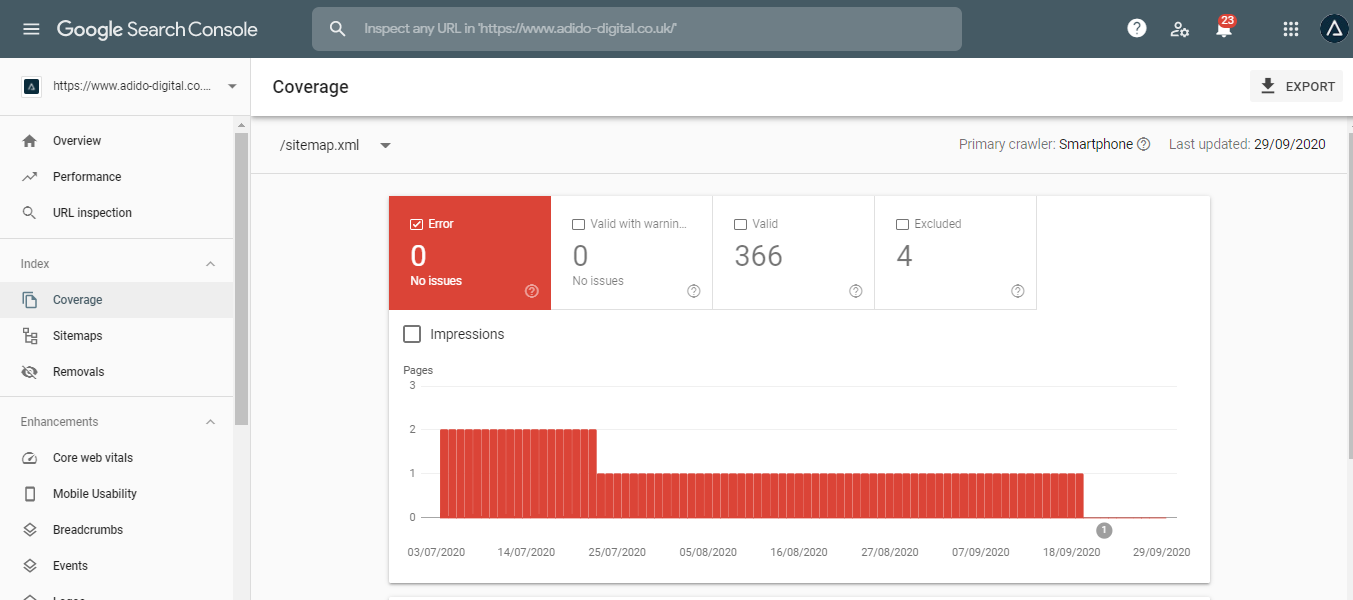
Within our audit, we are checking to make sure that sitemaps are present and crawlable, that they contain all of the pages on the website that we want crawled and indexed, that there are no errors such as broken links or pages which are blocked in robots.txt included in the sitemap (too many sitemap errors means Googlebot will ignore it) and that the XML sitemap has been added to Search Console, which helps Googlebot to regularly crawl and analyse it. Search Console is also a great place to check for errors in your sitemap:
Googlebot user agent crawl
One of the best ways in which to understand whether or not Googlebot can access your site, is to put your domain into a web crawling software, such as Screaming Frog, to crawl the site whilst replicating Googlebot’s crawling process. Googlebot is the ‘user agent’ that you apply to the web crawling software, which will then run a full crawl of the site as if it was Googlebot. This can be very useful for identifying any issues which may not be picked up elsewhere. For example, if Googlebot is being blocked by your server, the crawl won’t work, therefore you know that you need to contact your hosting provider to ensure Googlebot is not being blocked server-side.

Meta robots
Meta robots directives are pieces of code which you can apply to each individual webpage to instruct Googlebot on how it should index that page. This is similar to the robots.txt file, but it requires Googlebot to actually crawl that page in order to identify the directive. Whilst there are several uses for meta robots directives, such as instructing Google not to use the page’s content within a rich snippet on the search engine results pages etc., the main uses for meta robots are to instruct ‘noindex’ and ‘nofollow’.
Noindex
The ‘noindex’ directive quite simply tells Googlebot that the web page should not be indexed. There are several reasons why you might want to do this, for example if you website has a ‘thank-you’ page after a goal has been complete (such as a contact form completion), you don’t want the thank-you page to be indexed, so you would apply the noindex meta robots directive. This prevents tracking issues in Google Analytics if you have a goal set up to trigger when someone visits the ‘thank-you’ page. If that page were indexed and a user found it in the search engines, they might click it and it would trigger a goal in Analytics!
This is what the ‘noindex’ code snippet looks like:
<meta name="robots" content="noindex">
Nofollow
As of March 2020 Google no longer uses ‘nofollow’ as a directive, but rather as a hint instead. ‘Nofollow’ essentially tells web crawlers such as Googlebot that it should not crawl or attribute any authority to the links on that page (or to the individual link the ‘nofollow’ directive is applied to). This is often used on external links to other websites, particularly if those links are from a sponsored post, as this can protect the website that is linking out from coming across as spammy.
This is what the ‘nofollow’ code snippet looks like when applied to the entire page:
<meta name="robots" content="nofollow">
This is what the ‘nofollow’ code snippet looks like when applied to a specific link:
<a href="https://www.adido-digital.co.uk/" rel="nofollow">
Within our technical SEO audit, we are checking to ensure that there are no inappropriate meta robots directives causing crawling and indexing issues.
Canonicalisation
Canonical tags are snippets of code applied to web pages that instruct Googlebot on which version of a page to index. Often, websites will have multiple versions of a single page; for example, if your website sells chairs, there might be a page for a ‘plastic chair’. This plastic chair product might come in a variety of colours, so you might have a standard landing page for the plastic chair, but then another for the red plastic chair, and another page for the blue plastic chair:
https://www.example.com/plastic-chair/
https://www.example.com/plastic-chair/red/
https://www.example.com/plastic-chair/blue/
If the pages for the red and the blue plastic chair have exactly the same content on them as the standard plastic chair landing page, this can cause a duplicate content issue which may dilute the ranking potential for these pages. In this instance, you might want to apply a canonical tag to all of these pages which points to the standard landing page. That way, you are telling Googlebot to only index the standard landing page for the plastic chair, and not index the colour variation pages.
The canonical on the red plastic chair page would look like this:
<link rel="canonical" href="https://www.example.com/plastic-chair/" />
There are many other things we need to look for when checking canonicalisation, such as self referencing canonicals (ensuring that even pages which don’t have multiple versions are canonicalised to themselves) and checking that pages are consistently canonicalised to either trailing slash or non trailing slash versions of URLs and non trailing slash.
Find out how to check for canonical tags in the video below:
Hreflang
Hreflang won’t be present on every website, as it is used for websites with multiple language variations. Hreflang tags are snippets of code which tell Googlebot that the page has multiple language variations, therefore preventing Google from seeing the page as duplicate content and enabling Google to serve the correct language/location version of the page to users in different countries.
Here is an example of what a HTML Hreflang tag specifying both the language and location would look like on the Adido home page if we also had a Spanish version:
<link rel="alternate" hreflang="es-es" href="https://www.adido-digital.co.uk/es/" />
<link rel="alternate" hreflang="en-gb" href="https://www.adido-digital.co.uk/" />
There are a few ways in which Hreflang can be set up, including via the sitemap, within HTTP headers or within the HTML of each individual page. There are a number of checks we make for Hreflang:
- If there are multiple language variations on the site, is Hreflang setup?
- Is the Hreflang working correctly? (there are free tools you can use to check this, such as this one)
- Are Hreflang tags bidirectional (does the UK version point to the Spanish version and does the Spanish version point back to the UK version?)
- Does the page also contain a self-referencing Hreflang attribute?
- Is the self-referencing Hreflang attribute the same as the canonical on the page?
- Is every other language variation listed on each language variation page?
Website performance
Now that we know the website can be crawled and indexed appropriately, the next step is to look at the overall performance of the website and see if there is anything that can be improved or fixed to ensure maximum performance for both users and Search Engines.
Site speed
Site speed has been a known ranking factor for a long time now, but most websites still have site speed issues. Solutions are often complex and require a developer to fix, but diagnosing problems can be quite simple with the right tools. We use a variety of tools to discover issues, such as GTMetrix and Google’s own Pagespeed Insights tool.
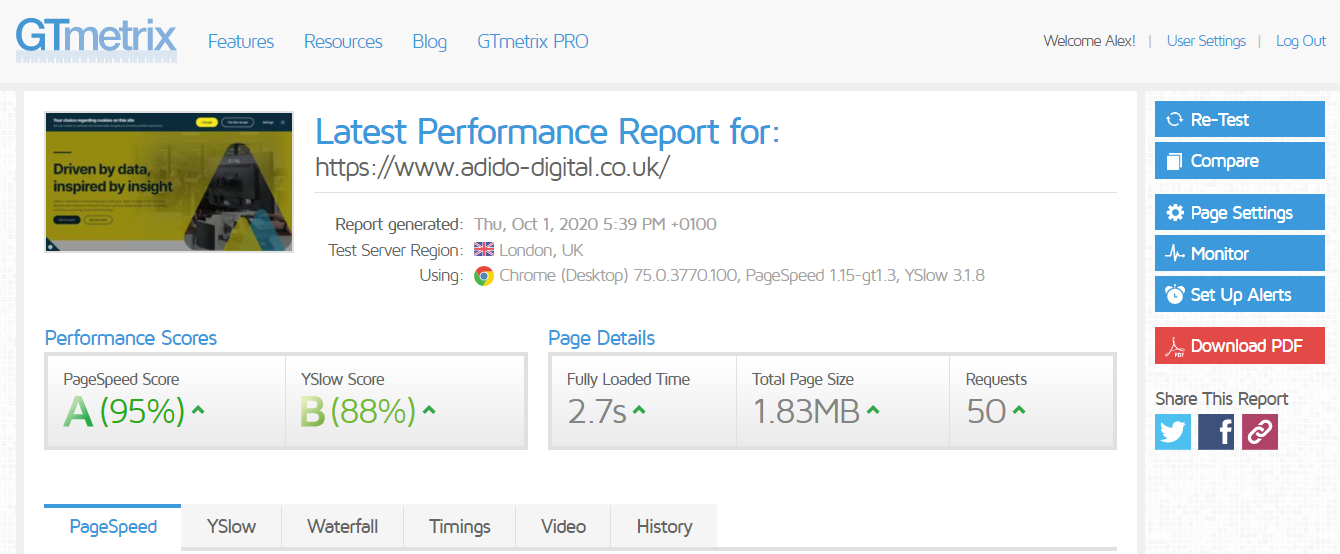
There are a number of things we are looking for during these tests, and the most common are usually:
- Enable compression: files sent from your server can be ‘compressed’ which reduces their size and speeds up the process so that those files appear on the users screen faster
- Leverage browser caching: for visitors that visit your site more than once, enabling browser caching means that files from your web page are stored in the user’s browser so that they don’t have to be loaded again next time they visit the page, therefore speeding up the page load process
- Defer parsing of JavaScript: whilst JavaScript is great for the look and feel of a web page, it can take longer to load. Deferring the parsing of JavaScript means that JavaScript is only loaded when needed, so the initial page load is faster as only the JavaScript at the top of the page needs to load, then as the user scrolls down the page the rest of the JavaScript loads as and when it is needed
- Reduce unnecessary tracking code: many websites have historical tracking code, whether that be from an old Facebook advertising campaign or any other platform. If that tracking code is no longer needed because you are no longer running the campaign, the tracking code should be removed as it has to be loaded which slows the page speed down
- Reduce image sizes: one of the easier site speed issues to resolve is image sizes. We are all guilty of uploading a huge image to our blog at some point without thinking of the consequences, but it doesn’t have to be this way! Image file sizes can be reduced using tools such as tinypng before uploading, saving valuable page load time. We are able to use Screaming Frog to download all images, filter them by size and identify any problem areas which need addressing first
There are many other factors related to site speed and each website will be unique in its problems and the solutions required, but these are some of the most frequent errors we see.
Core Web Vitals
Core Web Vitals are set to be a big part of Google’s algorithm in 2021, which is no bad thing as Core Web Vitals focus on the user experience a web page is offering. Core Web Vitals are quite closely related to site speed, and we use the Pagespeed Insights tool to analyse them.
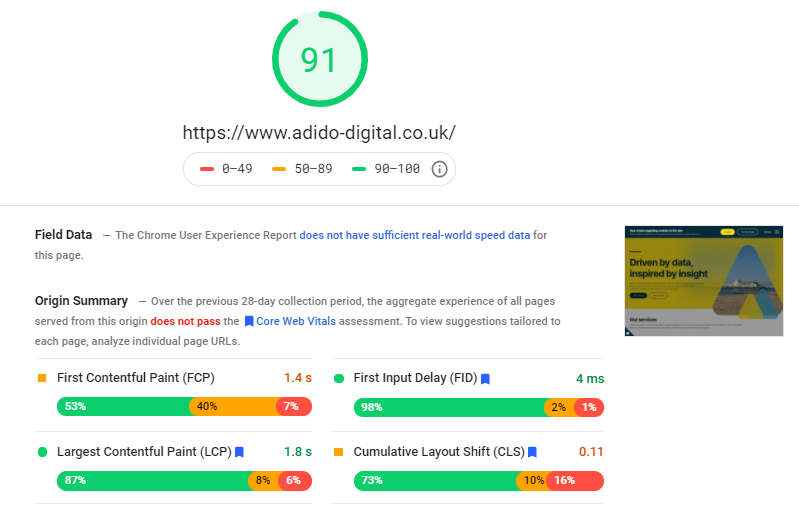
There are three main areas we currently look at:
- Largest Contentful Paint (LCP) - this measures how long it takes for the page’s main content to load, therefore making the page usable. Ideally, your website’s LCP will be below 2.5 seconds
- First Input Delay (FID) - this measures how quickly your website reacts and responds when users interact with its content. Ideally, your website should have a FID below 100 milliseconds
- Cumulative Layout Shift (CLS) - when you scroll through a webpage, there is nothing more annoying than when the content layout shifts around as you scroll. CLS measures how bad an issue this is for your site. We want to maintain a CLS of less than 0.1
You can also analyse your website’s performance in terms of Core Web Vitals in Search Console or the Chrome User Experience Report
Mobile usability
Google now uses a ‘mobile first index’, meaning your rankings are influenced much more heavily by your website’s mobile performance than its desktop performance. All websites should now be built with mobile usability in mind, whether that is via responsive design or a mobile version of the website.
Google provides the Mobile Usability Report within Search Console so that you can check specific errors on your own website. We also use the Mobile Friendly Test to identify any issues.
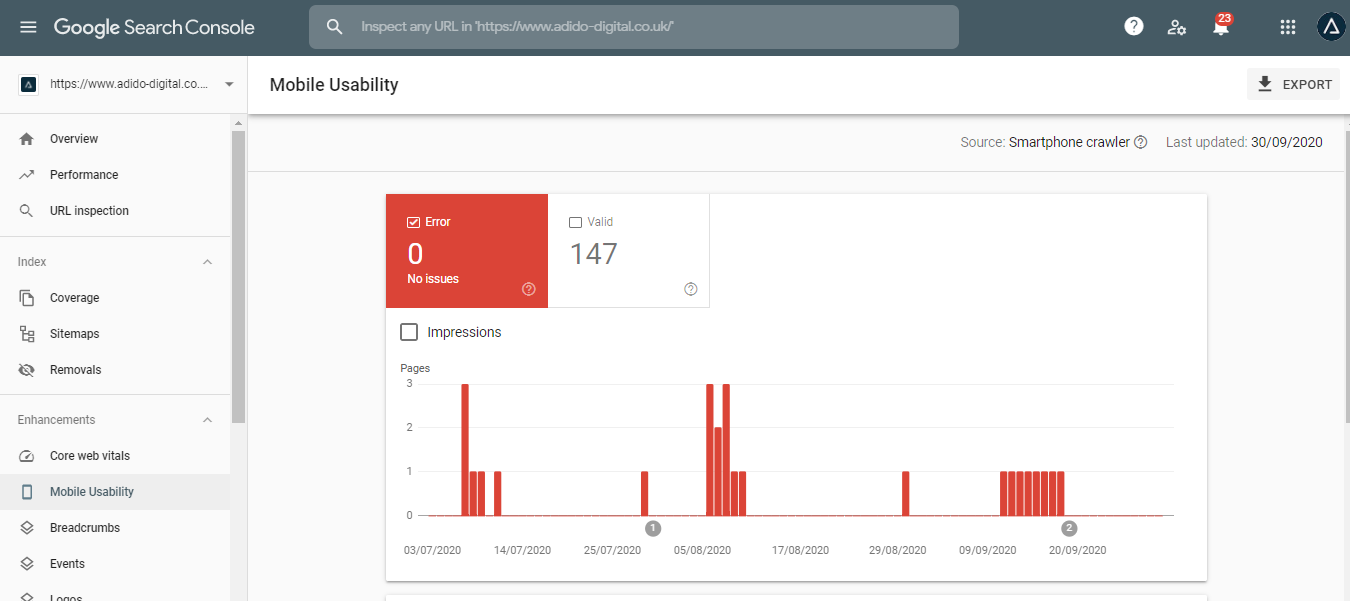
The following are the main issues you will come across:
- Text too small to read: if a user has to pinch and zoom to read your text on mobile, it’s too small
- Clickable elements too close together: make sure there is enough space between clickable elements such as buttons and links so that the user doesn't accidentally click the wrong button
- Content wider than the screen: users shouldn’t need to scroll horizontally on mobile, so ensure CSS elements are set up appropriately to prevent this
- Viewport not set: each page should define a viewport property which tells browsers how to adjust the dimensions of the page to suit various screen sizes
- Viewport not set to “device-width”: this occurs if your website doesn't have a responsive design, so the page is set to a specific device width, making it incompatible with other devices
- Uses incompatible plugins: if your page uses Flash or other plugins which are not compatible with mobile devices, you will see this error
Insecure content
HTTP (Hypertext Transfer Protocol) is the structure for transferring and receiving information on the web. By now, most websites are already using HTTPS (Secure Hypertext Transfer Protocol) which is essentially the more secure way to transfer and receive information. Google made this a ranking factor years ago, so if your site isn't already using HTTPS, it should be!
We don't just check whether or not your site is using HTTPS though, we also look to find any other links to insecure content on your website (links to HTTP). This helps to identify whether there are any issues with old HTTP URLs not redirecting to HTTPS correctly, but also, if they are redirecting correctly, it shows us where internal links need to be updated in order to reduce the number of redirects on your site, which impacts site speed and authority passed between pages. Ideally, rather than redirecting, internal links should be updated to the HTTPS version of the URL.
Redirects
As we have just covered, redirects can slow your website down if you have too many of them. They also reduce the level of authority passed from one page to another. So, we want to minimise them where possible.
The first step is to run a crawl of the site and identify any redirecting URLs found. You may find 301s and 302s. 301s are permanent redirects, meaning the page being redirected is never going to return. 302s should only be used if it’s a temporary redirect, so the page being redirected might return one day. Pull off the list of 302s and check whether they should be temporary. If they should be permanent, change them to 301s.
Next, you should look at all of the internal links on the site which link to the 301s/302s. You can do this via Screaming Frog. If possible, you should change all of those internal links so that they link to the final destination URL (which will have a 200 ‘OK’ status code), rather than the redirecting URL. This will minimise unnecessary internal redirecting links.
Next, you want to make sure that there are no redirect chains on your site. A redirect chain is when a page is redirected to another page, then that page is redirected to another page, and so on. Example:
PAGE A redirects to PAGE B redirects to PAGE C redirects to PAGE D
This will cause your site to slow down even more, and will also reduce the authority being passed through every part of the chain. Sometimes, these chains can be endless, so pull out your list of redirect chains and change the redirect so that it only includes two steps. Example:
PAGE A redirects to PAGE D
Finally, you will want to ensure you have redirect rules set up to avoid page duplication. Essentially, a redirect rule ensures there is only one version of your website being indexed. For example, Google sees the following two pages as separate pages, despite them having the same content:
http://www.adido-digital.co.uk/services/channel/seo
http://www.adido-digital.co.uk/services/channel/seo/
One has a trailing slash, and the other doesn’t. Redirect rules can be applied across the whole site to make sure Google does not find duplicate versions of your site. Find out more in the video below:
Crawl errors and status codes
One of the more common issues you might encounter when conducting a technical SEO site audit is crawl errors. These occur when the user cannot access a page for a number of reasons. The most common are as follows:
400 errors: More often than not, you will encounter 404 errors, which means ‘Page Not Found’. Usually, this is because the page has been deleted from the site or unpublished. There are other 400 errors with similar meanings.
500 errors: 500 errors are server side errors, meaning that the user cannot access the page due to a server side error.
When encountering crawl errors, you first need to identify whether the errors are occurring on pages which should be a 200 status code (meaning the page is ‘OK’). If so, this requires further investigation.
In most cases, the errors will be there because pages no longer exist. For 400 errors, you should create a 301 redirect to the most relevant page. If there aren't any relevant pages to redirect to, you can create a 410 error which tells Search Engines that the page is permanently ‘Gone’ and that it should not be indexed any more. For 500 errors, you might need to contact your hosting provider.
Website optimisation
The final part of the technical SEO site audit is to do some analysis of the ‘nice-to-have’ optimisation on the site. This part doesn't really impact whether your site will be indexed, or whether users will have a positive experience, but it does help to analyse how well you have optimised your site to go the extra mile and improve rankings.
Schema
Schema is a type of coding language that can be applied to a page to convey messages to the search engines about the page’s topical relevance. Schema is also used to pull rich content into the SERPs, such as star ratings and images. There are a ridiculous number of schema types, all of which are designed to give Google as much information about your page as possible. Your job, as the website owner, is to choose the best schema for the job.
If you head over to Schema.org, you’ll be able to browse a library of hundreds of different schema types. Searching the database will help you to discover the most relevant schema for your page.
During our technical SEO site audit, we check whether any schema already exists on the site and whether there are any errors which are preventing the search engines from recognising that schema. Schema errors are indicated within Search Console, but can also be identified using Screaming Frog or the Rich Results Test.
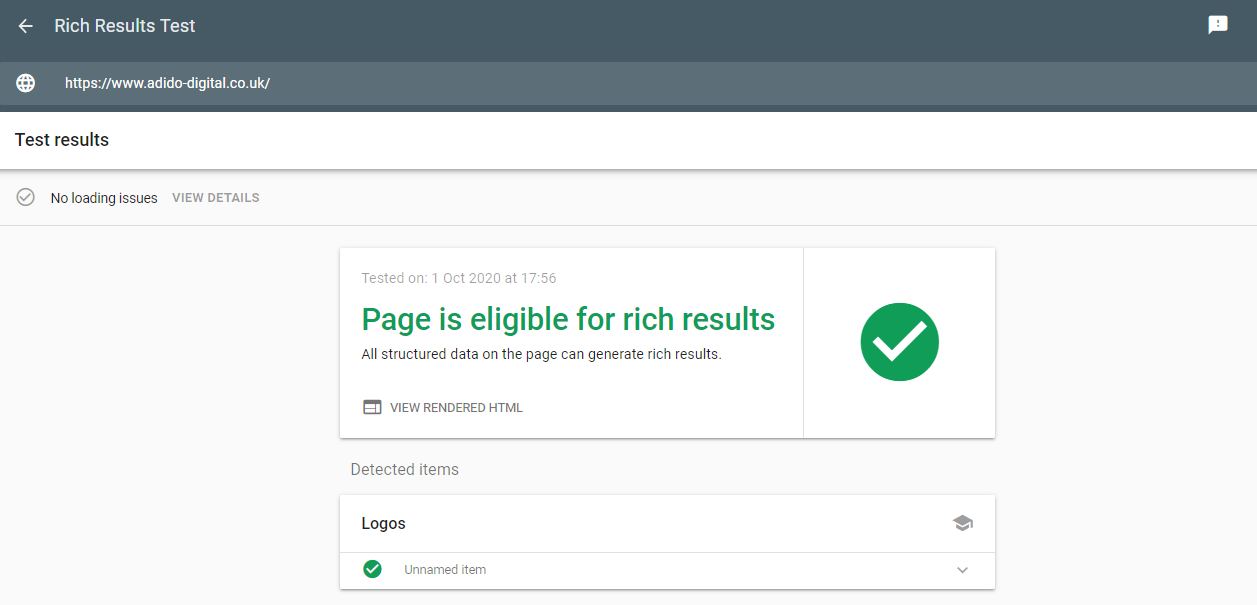
As a standard, we would expect Organisation schema to be applied to the home page. This helps Google to pull through a ‘Knowledge Graph’ about your business within the SERPs. If you have an ecommerce site, you should certainly be using Product schema, and if your site provides services, then you should use Service schema, but there are multiple variations that can be used. As SEO’s, it’s our job to recommend the right schema for each page.
You can find out more about schema in the video below:
https://www.adido-digital.co.uk/blog/article-schema-seo-tips-from-a-toddlers-bedroom-episode-6/
Content duplication
Having duplicate content on your site isn't necessarily a huge issue if it’s handled correctly through canonicalisation. A bigger issue, however, is if there is content on your site which is duplicated on another website.
The first check is to use a tool such as Siteliner to analyse the level of content duplication within your own site. You can then gain an understanding of whether it is a problem or not. If there is a high level of duplication and you haven't implemented canonicalisation, you either need to change the content, or implement canonical tags.
You can also use tools such as Copyscape to check for duplicate content on other websites. This can also help to identify whether other websites have scraped and stolen your content and are passing it off as their own.
Minimising your duplicate content will result in better quality, more unique pages overall, which are likely to rank better.
Meta titles and descriptions
The technical SEO site audit provides a great time to check for meta title and description issues across your entire website as you will have crawled the site and downloaded all of the data right in front of you to sort and filter through.

While you may not get a quick understanding of how well you have keyword optimised the titles and descriptions without a manual check of each one, there are a few things you can be checking:
- Are any pages missing meta titles or descriptions
- Are there any duplicate meta titles or descriptions
- Are there any meta titles and descriptions that are too long (general rule of thumb is to keep meta titles around 65 characters and meta descriptions around 165 characters)
- Are there any meta titles and descriptions that are too short (if it’s too short, Google may not use it)
This then provides you with a plan of action for your priority meta titles and descriptions to tackle going forward.
Header tags
Again, the technical SEO audit presents an opportunity to do a bulk check of header tags. Header tags help Google to understand the context of the page and what each section is about. They are also a great place to include keywords for ranking purposes.
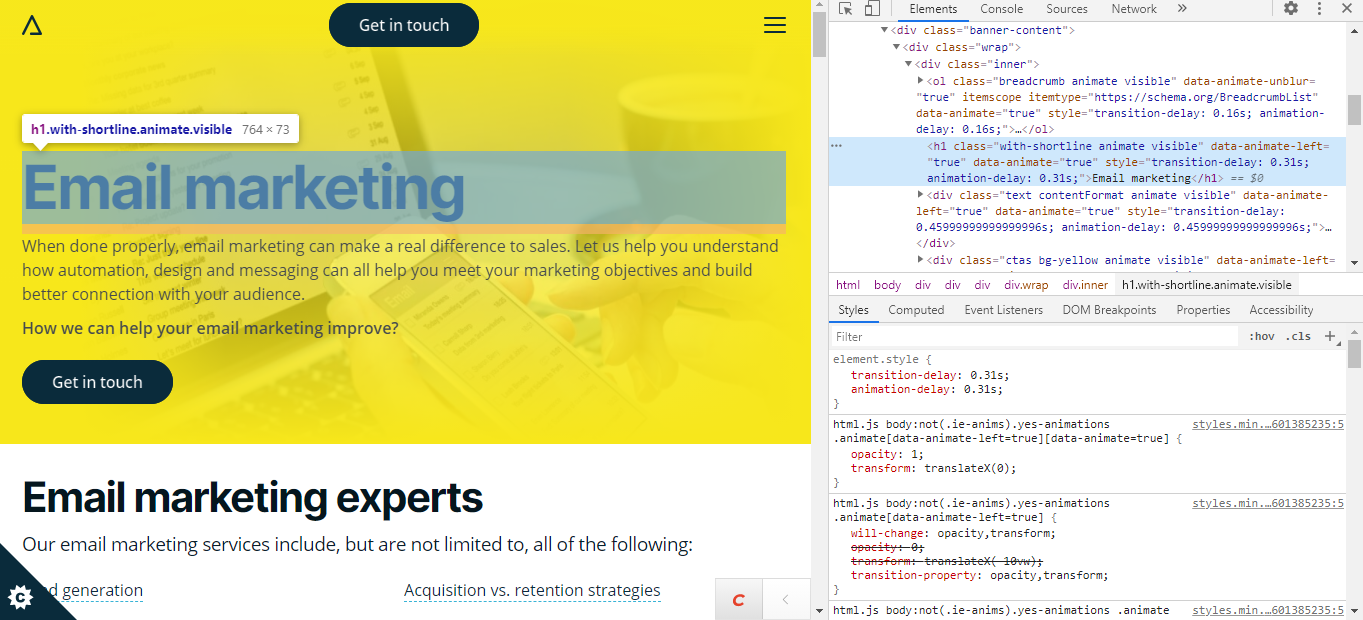
Here is what we are checking for:
- Are header tags present?
- Does every page have a H1?
- Is there more than one H1 per page? There shouldn't be!
- Does the page follow a structure of H1 first, then H2, H3 etc.?
Again, you now have a list of problem areas to work from.
Image alt attributes
An image alt attributes’ main purpose is to be used by screen readers to describe an image to the visually imparied, but they are also a great place to include target keywords. When we crawl the site, we can download a list of all the images and their alt attributes.
Here, we are just looking for images missing alt attributes and can add them to our optimisation list.
Once all of these checks are completed, you’ll be left with a to-do list of actions to improve the overall technical health of your website and on-page experience. If you would like more information on our technical SEO services or want us to conduct a technical SEO site audit on your website, contact us today.


